$HOME
, I have a good infrastructure to perform tests and study
whatever I want. Part of that infrastructure is an ESXi host with lots of VMs,
which also include my “bare-metal” Kubernetes cluster.
Another thing I have around is an internal DNS server, which uses one of my
domains to give those VMs different names.
However, there’s one thing that bothers me a lot: self-signed certificates. Some may say it is completely overkill to issue certificates for hosts that aren’t even exposed to the public internet, and they aren’t wrong. The point is that those warnings I get on my browser annoy me to a degree that I rather jump through some hoops than to keep getting them.
The issue is simply solved using the great Certbot
to issue a Let’s Encrypt wildcard certificate
to that domain I mentioned. That’s something straightforward to do, since
everything I need is to have a way to pass its dns-01
challenge, which
simply involves writing a small Python script that is called by Certbot, creates
TXT records on my DNS provider (the one keeping the public records of that
domain), and another one to clean it up afterwards.
However, there’s a small issue there. Certificates generated by Certbot are
using elliptic curves, and ESXi isn’t happy with it. Replacing certificates
from /etc/vmware/ssl
with the ones generated by Certbot makes it quite sad:
Failed to initialize the SSL context: N7Vmacore3Ssl12SSLExceptionE(SSL Exception: error:0688010A:asn1 encoding routines::nested asn1 error)
For ESXi, we will need to ask for an RSA certificate instead. This post is more of a reminder, cause I always forget what I did the last time that certificate expired, and immediately enter on a loop of “what is going on here?!”
First, ask certbot to generate a certificate using RSA:
certbot certonly --manual \
--preferred-challenges=dns \
--manual-auth-hook /var/dns/script/authenticator.sh \
--manual-cleanup-hook /var/dns/script/cleanup.sh \
-d '$ESXI_HOST' \
--key-type rsa
Then, ensure the ESXi host have SSH enabled, and:
scp /etc/letsencrypt/live/$ESXI_HOST/fullchain.pem user@$ESXI_HOST:/etc/vmware/ssl/rui.crt
scp /etc/letsencrypt/live/$ESXI_HOST/privkey.pem user@$ESXI_HOST:/etc/vmware/ssl/rui.key
ssh user@$ESXI_HOST -C "services.sh restart"
In case of emergencies, remember that the self-signed certificates can be restored
using generate-certificates
:
ssh user@$ESXI_HOST -C "/sbin/generate-certificates"
Of course, remember to restart the host services:
ssh user@$ESXI_HOST -C "services.sh restart"
Renewing the certificate is just a matter to re-run the certbot cert-only
command
(in full), copying fullchain.pem
and privkey.pem
to the host, and restarting
its services. Of course this can be scripted as a cron-job. Here I have a small
PC Engines APU that is responsible for running the DNS
server, that will eventually have a cron-job for doing that, but before that I
intend to keep renewing manually once or twice to make sure everything goes well.
An attention point here when renewing is that Certbot will suggest to upgrade the certificate to use elliptic curve. Do not upgrade it. Upgrading will require the certificate to be destroyed and re-created using RSA.
Finally, if you got at this point and also leverages Let’s Encrypt on your public or private hosts, consider donating to the Electronic Frontier Foundation, and support them on their mission to defend privacy, free speech, civil liberties and human rights online.
]]>$workplace
, folks with access to sensitive systems and infrastructure are
provided with YubiKeys to be used as a multi-factor authentication mechanism. In
the end, it is even better, as we can authenticate against services and systems
without even needing to enter a username/password combination. The device alone
is enough to bypass the authentication page. But this post is not about what you
can do on the web using YubiKeys. No. I’m more interested on how to leverage the
key to also lock and unlock my workstation based on its presence. The
workstation itself counts with disk encryption and other protections, so those
areas are already covered. But what if I could authenticate sudo
or even
lock/unlock the computer using the key that I already need to have with me at all
times whenever I’m handling anything work-related?
Today we will configure Linux to work with a YubiKey for authenticating sudo
password challenges, and also locking/unlocking the machine depending on the
presence of the key itself!
I will be working on a machine running Ubuntu LTS. But should be equivalent in other distros (YMMV). The key is an YubiKey 5C NFC in a keychain form factor.
Throughout this post we will be dealing with PAM. In case PAM sounds like something new, it may be enough to know that it is responsible for handling authentication in Linux. PAM stands for Linux Pluggable Authentication Modules. To quote the project:
PAM provides a way to develop programs that are independent of authentication scheme. These programs need “authentication modules” to be attached to them at run-time in order to work. Which authentication module is to be attached is dependent upon the local system setup and is at the discretion of the local system administrator.
Pretty fancy, eh? Anyway. If you intend to follow along the first precaution you
should take is make sure you don’t get locked out of your system. This can
be simply accomplished by having a spare terminal session as root, so in case
of an emergency, you will be able to rollback the system to an usable state.
Also, please do notice all shell commands here are prefixed with $
: they are
meant to be executed by your non-priviledged account.
Of course we will need some extra modules. Fire up a terminal, and sudo apt
install
the following packages:
libpam-yubico yubikey-personalization yubikey-manager
Each YubiKey has two “slots” on its OTP application. The IT department already
configured the first one and tied it to my account, but the second one is empty,
so I’ll use the later. Before continuing, make sure your slot is empty. This can
be done by using ykman
we just installed:
$ ykman otp info
Slot 1: programmed
Slot 2: empty
Empty is good! So let’s use that one. What we want to do here is configure that slot to contain a “Challenge-response” configuration, which is basically what the key already does, but without requiring the key to be touched. This of course is a reductive summary of what the configuration really is, and extensive documentation regarding it can be found on Yubico’s Website.
Now that we ensured our second slot is empty, it is time to configure it.
Doing so is really simple. We want to use ykman
to configure OTP’s chalresp
on slot 2:
$ ykman otp chalresp -g 2
Using a randomly generated key: ...
Program a challenge-response credential in slot 2? [y/N]:
ykman
wants a confirmation that we are sure we want to program slot 2. Hit y
with your favourite finger, and confirm.
The Initial Challenge file contains the expected challenge and response to be obtained in the next authentication round. It will be used by PAM later to assert whether a valid key is connected to the machine. As you may guess, this file contains sensitive information! We will need to store it with care.
First, let’s extract it. For that step, we will need ykpamcfg
:
$ ykpamcfg -2
Directory /home/vitosartori/.yubico created successfully.
Sending 63 bytes HMAC challenge to slot 2
Stored initial challenge and expected response in '/home/vitosartori/.yubico/challenge-12345678'
That was easy! However, there’s an important information right there: ykpamcfg
said it stored the challenge and expected response in a file. That file is called
challenge-<SERIAL>
, where SERIAL
is the serial of that specific key you are
using. In the example above, the key’s serial is 12345678
. We will need that
later!
libpam-yubico
will look for that challenge file in a few different
directories, but in order to accomplish our objective, we will need to move it
to a specific one. So let’s do it:
# Create the directory
$ sudo mkdir /var/yubico
# Ensure it belongs to root
$ sudo chown root:root /var/yubico
# And restrict access to it
$ sudo chmod 0700 /var/yubico
Finally, move the generated challenge to the directory we created. I’ll break this into two steps cause the first one requires a bit extra attention:
sudo mv /home/vitosartori/.yubico/challenge-12345678 /var/yubico/vitosartori-12345678
The name of destination file is important! It must comprise your username,
followed by a dash, followed by the key’s serial. Effectively, we must move it
to /var/yubico
and replace the challenge
part of the filename with your
username.
Finally, fix file permissions and ownership:
sudo chown root:root /var/yubico/*
sudo chmod 0600 /var/yubico/*
We will now configure Yubico’s PAM to use challenge-response mode, look for
challenges on /var/yubico
, and temporarily enable a debug mode (so we make
sure everything is alright and figure out in case anything goes awry during
authentication tests.)
For this step we will leverage dkpg-reconfigure
to do some magic. To get a
complete list of available options, check yubico-pam’s repository.
This procedure will be performed in two steps, since they require some extra
attention. First, run dpkg-reconfigure
:
$ sudo dpkg-reconfigure libpam-yubico
It will show a dialog explaining operation modes and such. Select the text field and erase all its contents. Then, enter the following parameters:
mode=challenge-responds chalresp_path=/var/yubico debug
Then, confirm the changes. Another dialog will be displayed, asking to select
which behaviours are to be enabled. Look up for the Yubico authentication with
YubiKey
, and make sure it checked, then confirm changes.
Finally, it’s time to just change a small setting. By default, the new PAM
module will be configured as required
, which means it will be the sole
authentication method on the system. This is not what we want; I think having
YubiKey support is interesting, BUT being able to type my long password is also
important. Let’s change this.
Fire up your preferred editor to edit /etc/pam.d/common-auth
. I’ll use vim:
$ sudo vim /etc/pam.d/common-auth
Then, look for a line defining pam_yubico.so
as an authentication module.
It should look like this:
auth required pam_yubico.so mode=challenge-response chalresp_path=/var/yubico debug
Then, replace required
with sufficient
, and save the file.
Finally! Ensure your key is still connected to your system, open a new terminal session, and
run sudo -s
:
$ sudo -s
debug: ../pam_yubico.c:838 (parse_cfg): called.
debug: ...lots of
debug: ../pam_yubico.c:1220 (pam_sm_authenticate): done. [success]
# whoami
root
#
If you are now in a root shell, congratulations! It is done! Now disconnect the
key, open a new shell, and try sudo -s
. Authenticate using your password. If
it works, then we are done! There’s just one last step…
Of course we don’t want that much log whenever we run sudo
. If everything is
as it should be, we don’t need that debug
parameter any longer. Open your
editor on /etc/pam.d/common-auth
, locate the pam_yubico.so
, and remove
the last debug
parameter. Save, and it’s done! Even GNOME’s screen lock works
out of box!
To download an image from ghcr.io, a few preconditions must be met.
Naturally, the container image must be present in the ghcr.io repository, and it
also needs a special Internal
visibility. To achieve that, go to the
image’s package page, click Package Settings
on the right-side menu, and
scroll all the way down to the Danger Zone. There, select Change Visibility
,
and then pick Internal
. That will allow the Actions Workflow to access it as
long as the package and the workflow being executed belong to the same
organisation.
Now, on the workflow, one may proceed as usual, using the image as stated in
the package page, and using github.actor
and secrets.GITHUB_TOKEN
in the
service’s credentials
key:
on:
push:
branches: [master]
jobs:
test:
services:
internal-service:
image: ghcr.io/org/internal-service:latest
credentials:
username: ${{ github.actor }}
password: ${{ secrets.GITHUB_TOKEN }}
steps:
- uses: actions/checkout@v2
# ...
This should be enough to download and start the internal container image as a service container in the Workflow.
]]>This post is not about anyting special, but to give you a little context, I’ve been working on an embedded system to display anything I need in a somewhat pretty fashion. To make things even more fun, I decided to put Sharp’s Memory Display to good use, and for that, I also decided to mimic System 6’s UI. In my very humble opinion, System 6 — to be honest, the whole System 1-6 family — was a remarkable breakthrough for modern personal-computing. In case you are not acquinted with it, I suggest watching Susan Kare explains Macintosh UI ergonomics on the Computer Chronicles.
So, let’s step back from history itself and go to the point of this post. Writing that UI from scratch is a really fun (and mind-blowing) experience, and I do have some interesting hardware constraints to deal with (like having 32Kb of RAM), so keeping things minimal is really important. To handle images and icons, I ended up working on a really naïve implementation of a bitmap format, which ended up being quite an interesting adventure itself, but then I just realised drawing all those monochromatic images using zeroes and ones was a bit too much. I immediately thought about using aseprite, but I also always wanted to try to implement some graphical application, and given we have lots of time to spend on this little project, why not put my rusted (no pun intended) Cocoa skills to use?
Everything was going great until I found a major problem regarding
NSScrollView
, its clipview, centering, and zooming. We can find several folks
discussing this very same “problem” on StackOverflow and other places, but all
answers are dated, and Apple’s documentation wasn’t that helpful either. To be
honest, Cocoa development in general seems to be a quite wild field. There’s not
really much content available online, and folks seem to be keeping all their
secrets to themselves.
So, how can we center a document view in an NSScrollView
without jumping
through many hoops? (I do invite you to picture those hoops on fire, just for
the extra dramatic effect.)
It happens that AppKit being the monstrous legacy it is (20+ years, give or take), autolayout can’t save us every time. You can try to hook up some constraints, just to notice it will just not work at all (and if you insist, things will go awry, trust me.) This can be extra frustrating for folks coming from UIKit, which being so much younger than AppKit, makes dealing with this kind of stuff a walk in the park.
Achieving this required a bit of tinkering with a lot of dusty posts from all around the interwebs, but this is how I finally figured out how to make it work.
Start by creating an empty Xcode project, I’ll be using Swift and Storyboards.
Once you have your view controller, place a NSScrollView
into it, and attach
some constraints to keep it the same size as its parent view:
NSScrollView
is composed by the scrollview itself, a NSClipView
, responsible
for doing some magic that provides the scrollview all its features, and finally,
the view to be displayed in the scrollview. In order to maintain everything
centered, we will need to subclass NSClipView
in order to align everything as
needed:
import AppKit
final class CenteringClipView: NSClipView {
override func constrainBoundsRect(_ proposedBounds: NSRect) -> NSRect {
var constrainedClipViewBounds = super.constrainBoundsRect(proposedBounds)
guard let documentView = documentView else {
return constrainedClipViewBounds
}
let documentViewFrame = documentView.frame
// If proposed clip view bounds width is greater than document view frame width, center it horizontally.
if documentViewFrame.width < proposedBounds.width {
constrainedClipViewBounds.origin.x = floor((proposedBounds.width - documentViewFrame.width) / -2.0)
}
// If proposed clip view bounds height is greater than document view frame height, center it vertically.
if documentViewFrame.height < proposedBounds.height {
constrainedClipViewBounds.origin.y = floor((proposedBounds.height - documentViewFrame.height) / -2.0)
}
return constrainedClipViewBounds
}
}
Then, head to the Document Outline panel, pick the scrollview’s clip view, and
use the Identity Inspector to set CenteringClipView
as its class. That will
be enough to keep things centered in the NSScrollView
.
The document view is another thing that needs our attention. First, let’s
implement a simple NSView
subclass to let us actually see the view. Create
a new SimpleView.swift
file with those contents:
final class SimpleView: NSView {
override var wantsUpdateLayer: Bool {
return true
}
required init?(coder: NSCoder) {
super.init(coder: coder)
self.translatesAutoresizingMaskIntoConstraints = false
}
override func updateLayer() {
layer!.backgroundColor = NSColor.blue.cgColor
}
override var intrinsicContentSize: NSSize {
return NSSize(width: 64, height: 64)
}
}
To summarise the contents of that file, we override wantsUpdateLayer
, so we
can use updateLayer
to handle the drawing (instead of relying on CPU-bound
operations). Then, we also override our required initialiser to set
translatesAutoresizingMaskIntoConstraints
to false
. Otherwise, our (final)
overridden intrinsicContentSize
will not work.
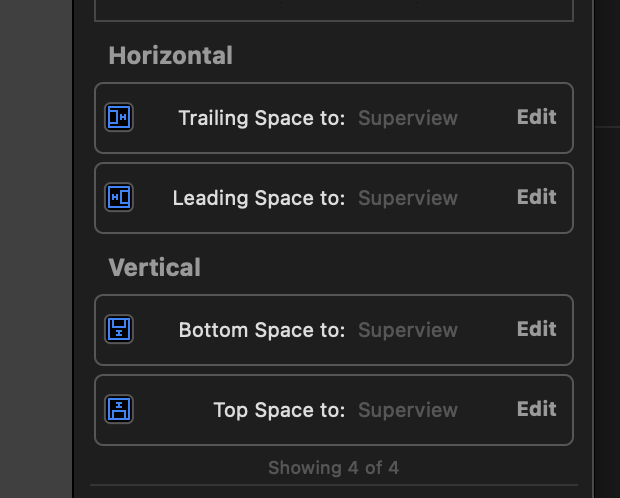
There are two extra changes I also made using Interface Builder that provided me some positive results:
The result is a fully functional NSScrollView that centers its contents and also doesn’t mangle magnification gestures nor anything of the likes.
That’s it!
]]>jq
and such, but I was so happy to have time to spend on Cocoa development that I coudln’t help myself.
This tool I mentioned allows one to also query the file using the same query syntax as another package I pushed to GitHub, uyaml, and that was a nice opportunity to implement a simple Syntax Highlighter. In case you’re look for a well-implemented solution, I’d suggest you to check Uli Kusterer’s UKSyntaxColoredTextDocument. Otherwise, keep on reading.
This post will probably cover two distinct parts: Parsing the query language, and implementing a syntax highlighter for it.
As I mentioned, the query syntax is quite the same as uyaml
’s, and it is nothing super fancy. Suppose we have the following JSON payload:
{
"contacts": {
"f": [
{
"name": "Fefo",
"email": "hey@fefo.dev"
}
]
}
}
…and we want to get Fefo’s email address. We can express that query in two distinct ways: using indexes, or a selector.
The first option would yield a query that looks like contacts.f[0].email
, whilst the second one would allow us to be a little more flexible: contacts.f.(name = "Fefo").email
. Both queries points to the same value for the structure above. So, how can we parse those queries? Great question!
Parsing can actually be done in several ways, from some really fancy ways using say, flex, to the most primitive, where we just implement a finite state machine and get done with it. Here we will use the second option, since the query syntax is quite simple.
Side note: Some readers may be feeling a urge to just drop a regular expression and be done with it. That’s another way of solving this, but I’ll stick with the FSM so we have an opportunity to build something from scratch.
Our queries are composed of three elements: keys, indexes, and selectors. Each one is separated by a dot, except for indexes, which uses something resembling a subscript operator. I don’t think we should be able to allow indexes to be applied directly to selectors, so let’s assume that for now.
In Swift, we can express those items using an enum:
enum Query {
case key(String)
case index(Int)
case selector(key: String, value: String)
}
As we will also be working with syntax highlighting, it would be interesting to use the same parser to emit ranges of elements found within the query string. Let’s add another enum to wrap a Query
value with its corresponding locations.
Side note: Here I wanted to separate results of selectors (
(key = "value")
) into two segments, so we can colour each segment independently. This will probably yield some ugly code that we will need to refactor before having anything production-grade, but to keep things simple I’ll only include the “naive” approach here.
enum QueryElement {
case simpleElement(_ element: Query, location: NSRange)
case keyValueElement(_ element: Query, keyLocation: NSRange, valueLocation: NSRange)
}
Again, our parser will be a simple FSM. So let’s define all possible states for it:
enum State {
case key
case selectorKey
case selectorOpenQuote
case selectorValue
case selectorEnd
case subscriptValue
case matchDotOrSubscript
}
…and also a few constants to allow us to reduce the amount of hardcoded values:
let LPAREN: Character = "("
let RPAREN: Character = ")"
let LSQUARED: Character = "["
let RSQUARED:Character = "]"
let DOT: Character = "."
let EQUAL: Character = "="
let QUOTE: Character = "\""
let ESCAPE: Character = "\\"
let SPACE: Character = " "
Each state has its own rules, which follows:
key
matches a single character until either a DOT
, LPAREN
, or LSQUARED
character is found. This state also rejects input in case it finds a LPAREN
after any text, since our selectors must begin right at the beginning of the query or right after a DOT
.selectorKey
matches all characters until a EQUAL
is found. Obtained values are then used as the key
value for our selector.selectorOpenQuote
matches a single QUOTE
that must follow the last EQUAL
found by the selectorKey
state.selectorValue
matches all text until a QUOTE
that’s not followed by ESCAPE
is found.selectorEnd
matches a single RPAREN
that must exists right after our closing QUOTE
.subscriptValue
matches all numbers after a LSQUARED
until an RSQUARED
is found.matchDotOrSubscript
matches a single DOT
, a subscript start character ([
) or expects the end of a query.The following graph can express how states are transitioned:
Additionally, it’s important to have a way to emit errors. Let’s create another enum for that:
enum QueryError: Error {
case emptyQuery
case unexpectedToken(_ token: Character, position: Int)
case unexpectedEOF
}
Finally, we can then implement the parser:
class QueryParser {
// state stores the current parser state, which we will then use in a
// switch-case structure to define behaviour for each of them
fileprivate var state: State = .key
// escaping indicates whether the last character was a escape (\), which
// allows us to use double-quotes inside double-quotoes, for instance.
private var escaping = false
// Result retains all elements identified, and is returned to the
// caller.
private var result: [QueryElement] = []
// startAt identifies where the current element started at. This is used
// for keys and indexes. Selectors will use the other set of variables
// prefixed with tmpSelector* and selector*
private var startAt: Int = 0
// Cursor indicates in which character in the query string we are
private var cursor = 0
// tmpKey retains the temporary value for keys and indexes
private var tmpKey = ""
// tmpSelectorKey retains the temporary value for a selector key
private var tmpSelectorKey = ""
// ...and the selector value
private var tmpSelectorValue = ""
// selectorKeyBegin represents the character index where the current
// tmpSelectorKey started at.
private var selectorKeyBegin = 0
// selectorValueBegin represents the character index where the current
// selectorValue started at.
private var selectorValueBegin = 0
// append is a utility function used to add a given character to tmpKey
// and also set whether we will escape the next character.
private func append(_ el: String.Element) {
tmpKey.append(el)
escaping = el == ESCAPE
}
// addResult is used by addSimpleResult and addComplexResult; it is
// responsible for appending a new result into our result array,
// reset our tmpKey, and set startAt to the current positition.
private func addResult(_ v: QueryElement) {
result.append(v)
tmpKey = ""
startAt = cursor
}
// addSimpleResult adds a key or index to the result array, and implicitly
// uses startAt and the tmpKey length to set its location within the query
// string
private func addSimpleResult(_ v: Query) {
addResult(.simpleElement(v, location: NSMakeRange(startAt, tmpKey.count)))
}
// addComplexResult adds a selector to the result array, using the provided
// ranges to identify its inner components' location within the query string
private func addComplexResult(_ v: Query, keyRange: NSRange, valueRange: NSRange) {
addResult(.keyValueElement(v, keyLocation: keyRange, valueLocation: valueRange))
}
// feed takes a single character and handles it based on the current FSM's
// state. This is the heart of the FSM, where all logic is implemented.
private func feed(_ c: String.Element) -> QueryError? {
cursor += 1
switch state {
case .key:
if c == DOT && !escaping {
addSimpleResult(.key(tmpKey))
return nil
} else if c == LPAREN && !escaping {
// We should not have a previous string before a LPAREN
if !tmpKey.isEmpty {
return .unexpectedToken(LPAREN, position: cursor)
}
state = .selectorKey
selectorKeyBegin = cursor
tmpSelectorKey = ""
return nil
} else if c == LSQUARED && !escaping {
if !tmpKey.isEmpty {
addSimpleResult(.key(tmpKey))
}
state = .subscriptValue
return nil
}
append(c)
case .selectorKey:
if c == EQUAL && !escaping {
state = .selectorOpenQuote
return nil
}
tmpSelectorKey.append(c)
case .selectorOpenQuote:
if c != SPACE && c != QUOTE {
return .unexpectedToken(c, position: cursor)
}
if c == SPACE {
return nil
}
selectorValueBegin = cursor
state = .selectorValue
case .selectorValue:
if c == QUOTE && !escaping {
state = .selectorEnd
return nil
}
tmpSelectorValue.append(c)
escaping = c == ESCAPE
case .selectorEnd:
if c != SPACE && c != RPAREN {
return .unexpectedToken(c, position: cursor)
}
if c == SPACE {
return nil
}
state = .matchDotOrSubscript
addComplexResult(.selector(key: tmpSelectorKey, value: tmpSelectorValue),
keyRange: NSMakeRange(selectorKeyBegin, tmpSelectorKey.count),
valueRange: NSMakeRange(selectorValueBegin, tmpSelectorValue.count))
tmpSelectorKey = ""
tmpSelectorValue = ""
case .subscriptValue:
if !c.isNumber && c != RSQUARED {
return .unexpectedToken(c, position: cursor)
}
if c != RSQUARED {
append(c)
return nil
}
if tmpKey.isEmpty {
return .unexpectedToken(c, position: cursor)
}
addSimpleResult(.index(Int(tmpKey)!))
state = .matchDotOrSubscript
case .matchDotOrSubscript:
if c == DOT {
state = .key
} else if c == LSQUARED {
state = .subscriptValue
} else {
return .unexpectedToken(c, position: cursor)
}
}
return nil
}
// finish is called after all characters are fed into the FSM and asserts
// whether the final FSM state is valid for the end of the stream.
func finish() -> QueryError? {
if state != .key && state != .matchDotOrSubscript {
return .unexpectedEOF
}
if state == .key {
addSimpleResult(.key(tmpKey))
tmpKey = ""
}
return nil
}
// parse is a class method that takes a string and feeds each of its
// characters into the FSM, returning an error or result after it's done.
public class func parse(query: String) -> Result<[QueryElement], QueryError> {
let inst = QueryParser()
for c in query {
if let err = inst.feed(c) {
return .failure(err)
}
}
if let err = inst.finish() {
return .failure(err)
}
return .success(inst.result)
}
}
With the parser in place, we’re ready to implement the syntax highlighter.
Once one searches the web on how to do that, several folks uses NSTextStorageDelegate
or even subclasses NSTextView
.
I personally find this to be a poor decision; it’s easy to mess things up when dealing with text, which will then create a myriad of errors and weird behaviours.
My solution is to just listen for NSText.didChangeNotification
and do whatever we need to do there. This is interesting because it will allow us to quickly respond to user input, and since our query language is quite simple, handling this synchronously won’t cause the main thread to become unresponsive. The result is a syntax highlighting that updates as soon as the user types one letter.
So, to continue, we add a new TextView to the storyboard, hook up some outlets, and create a new class to handle events:
//
// QuerySyntaxHighlighter.swift
// jv
//
// Created by Vito on 11/10/2021.
//
import Cocoa
class QuerySyntaxHighlighter {
let notificationCenter = NotificationCenter.default
var textView: NSTextView? {
didSet {
if let currentSubscription = self.subscription {
notificationCenter.removeObserver(currentSubscription)
}
notificationCenter.addObserver(forName: NSText.didChangeNotification,
object: self.textView,
queue: .main) { [unowned self] notification in
self.textViewDidChange(notification)
}
}
}
private var subscription: NSObjectProtocol?
}
At a first glance, there’s nothing really fancy going on. As soon as we receive
a new textView
to observe, we remove the previous observer, if it exists, and
prepare a new observer to the received view. We then invoke textViewDidChange
once we receive a notification, and that’s it.
My implementation of textViewDidChange
simply invokes another method called updateSyntaxHighlight
:
private func textViewDidChange(_ notification: Notification) {
updateSyntaxHighlight()
}
And this method is responsible for doing all the magic:
private func updateSyntaxHighlight() {
guard let tf = self.textView else { return }
guard let lm = self.textView?.layoutManager else { return }
let result = QueryParser.parse(query: tf.string)
// Remove all attributes...
lm.removeTemporaryAttribute(.foregroundColor, forCharacterRange: NSMakeRange(0, tf.string.count))
lm.removeTemporaryAttribute(.underlineColor, forCharacterRange: NSMakeRange(0, tf.string.count))
lm.removeTemporaryAttribute(.underlineStyle, forCharacterRange: NSMakeRange(0, tf.string.count))
if case .failure(let error) = result {
switch error {
case .emptyQuery:
return // Nothing to do here!
case .unexpectedToken(_, position: let position):
lm.addTemporaryAttributes([
.underlineColor: errorColor,
.underlineStyle: NSUnderlineStyle.thick.rawValue,
], forCharacterRange: NSMakeRange(position, 1))
case .unexpectedEOF:
lm.addTemporaryAttributes([
.underlineColor: errorColor,
.underlineStyle: NSUnderlineStyle.thick.rawValue
], forCharacterRange: NSMakeRange(tf.string.count - 1, 1))
}
return
}
if case .success(let info) = result {
for selection in info {
switch selection {
case .simpleElement(let el, location: let location):
switch el {
case .key(_):
lm.addTemporaryAttributes([
.foregroundColor: JColor.structure.color
], forCharacterRange: location)
case .index(_):
lm.addTemporaryAttributes([
.foregroundColor: JColor.number.color
], forCharacterRange: location)
case .selector(key: _, value: _):
break
}
case .keyValueElement(_, keyLocation: let keyLocation, valueLocation: let valueLocation):
lm.addTemporaryAttributes([
.foregroundColor: JColor.structure.color
], forCharacterRange: keyLocation)
lm.addTemporaryAttributes([
.foregroundColor: JColor.string.color
], forCharacterRange: NSMakeRange(valueLocation.location - 1, valueLocation.length + 2))
}
}
}
}
The layout manager’s temporary attributes are also used by macOS to annotate
spelling errors and such, so we can also use it to decorate the text inside
it. JColor
is a simple enumeration that returns colors based on the current
user’s theme, so we can use different colors for users using a light or dark appearance.
I found the result to be quite acceptable for such a small amount of code:
That’s not the code I’ll be shipping in the final application, but it may be helpful for someone getting started on a syntax highlighter or needing to have something alike in their app. :)
Oh, and jv
is available on the App Store! If you’d like to use it, or just found this post interesting, consider purchasing it! It only costs 99 cents! <3
It wasn’t before a few minutes ago that I learned about Google Apps Script, a platform offered by Google to automate tasks. Not sure how I never heard about that before, but well, go figure. Apps Script ends up being a really easy way to schedule tasks to run periodically, or even based on other triggers, which I will explain right below.
My goal here is to have a script to run and add a new conference room to any calendar event I create with the prefix “Call:”, since well, Calendar.app does not do that. To get started, access script.gooogle.com
and create a new project. With the editor open, use the +
button next to Services to add a new Calendar service integration. Documentation is well written and available here.
Before continuing a Calendar ID
is required. It can be found over at Google Calendar, clicking the three dots on the right of your calendar on the leftmost sidebar, and scrolling to the end, right over at the Integrate calendar section. Since it is my primary calendar, it happen to be my email address, but your mileage may vary.
With the Calendar ID
at hand, we can begin hacking on the script itself. Luckily, App Scripts supports all methods and objects from Google APIs, so it boils down to a simple lookup and patch:
function addGoogleMeet() {
var calendarId = 'yourCalendarId';
var now = new Date();
var events = Calendar.Events.list(calendarId, {
timeMin: now.toISOString(),
singleEvents: true,
orderBy: 'startTime',
maxResults: 10
});
if (events.items && events.items.length > 0) {
for (var i = 0; i < events.items.length; i++) {
var event = events.items[i];
if (!event.organizer.self) {
// Do not touch invites from others.
continue;
}
if (event.summary.toLowerCase().indexOf("call:") !== 0) {
// Do not touch events not marked as a call.
continue;
}
if (event.conferenceData && event.conferenceData.conferenceSolution
&& event.conferenceData.conferenceSolution.key
&& event.conferenceData.conferenceSolution.key.type) {
// Event already have a conference. :)
continue;
}
Logger.log("Updating event: %s (%s)", event.id, event.summary);
var updatedEvent = Calendar.Events.patch({
conferenceData: {
createRequest: {
conferenceSolutionKey: {
type: "hangoutsMeet",
},
requestId: Utilities.getUuid(),
},
},
}, calendarId, event.id, { conferenceDataVersion: 1 });
Logger.log("Updated event: %s", updatedEvent);
}
} else {
Logger.log('No events found.');
}
}
The script itself is quite simple. It just looks for the next 10 upcoming events created by the current authenticated user, checks whether they already have a Google Meet set up, and sets one up when needed.
The last step is to set a trigger to run that script as soon as the calendar is updated, which is easy enough thanks to the Triggers section present in the Apps Script platform. In order to do that, find the “Triggers” section in the left sidebar, then choose “Add Trigger” on the bottom right.
When creating the new trigger, choose “From calendar” as the event source, and “Calendar updated” on “Enter calendar details”; also fill your email on “Calendar owner email”, and save. To test, create a new event, prefixing its title (or summary) with “Call: “, save it, wait a few seconds, and refresh your Calendar.app to see your event updated with a Google Meet link. ✨
]]>The solution was to write the CSR manually (sort of manually, see below),
defining all asn1
bits. That comprised of digging through the documentation,
implementation files and tests, so I could understand what was happening behind
the courtains. Personally, what most intriged me was Go checking for a prefix
in a type name through reflection to determine whether it was an ASN.1 sequence
or set.
So, first of all, let’s determine what we will need to generate our Subject
line: Object IDs for all the fields we plan on filling, a custom type so we
can write UTF8String
instead of PrintableString
(Only Country is
PrintableString
), and a custom type so we can get sets instead of sequences.
package generator
import (
"crypto/rand"
"crypto/rsa"
"crypto/x509"
"crypto/x509/pkix"
"encoding/asn1"
"encoding/pem"
)
var (
oidCountry = asn1.ObjectIdentifier{2, 5, 4, 6}
oidOrganization = asn1.ObjectIdentifier{2, 5, 4, 10}
oidOrganizationalUnit = asn1.ObjectIdentifier{2, 5, 4, 11}
oidCommonName = asn1.ObjectIdentifier{2, 5, 4, 3}
oidLocality = asn1.ObjectIdentifier{2, 5, 4, 7}
oidProvince = asn1.ObjectIdentifier{2, 5, 4, 8}
)
type ASNUTF8String struct {
Type asn1.ObjectIdentifier
Value string `asn1:"utf8"`
}
// AnySET is an interface{} slice; SET is required by asn.1 to generate it
// as a set instead of a sequence.
type AnySET []interface{}
Then, to the implementation. The CSR requires a private key, which in my case was storad in a PKCS#12 container. Reading it is easy using Go’s crypto packages. One of the CSR’s Organizational Unit values and the Common Name is provided through arguments, together with two byte slices containing the private key, and its password. Error checks were elided to keep the example small.
func GenerateCSR(private, password []byte, commonName, OU string) ([]byte, error) {
block, _ := pem.Decode(private)
var rawBlock []byte
var key *rsa.PrivateKey
rawBlock, _ = x509.DecryptPEMBlock(block, password)
key, _ = x509.ParsePKCS1PrivateKey(rawBlock)
attributes := []AnySET{
{ASNUTF8String{Type: oidCommonName, Value: commonName}},
{ASNUTF8String{Type: oidOrganizationalUnit, Value: OU}},
{ASNUTF8String{Type: oidOrganizationalUnit, Value: "Another OU Value"}},
{ASNUTF8String{Type: oidOrganizationalUnit, Value: "Yet another OU Value"}},
{ASNUTF8String{Type: oidOrganization, Value: "Organization Name"}},
{ASNUTF8String{Type: oidLocality, Value: "Locality Name"}},
{ASNUTF8String{Type: oidProvince, Value: "Province"}},
{pkix.AttributeTypeAndValue{Type: oidCountry, Value: "Country Code"}},
}
attrBytes, _ := asn1.Marshal(attributes)
template := x509.CertificateRequest{
RawSubject: attrBytes,
}
csrBytes, _ := x509.CreateCertificateRequest(rand.Reader, &template, key)
return pem.EncodeToMemory(&pem.Block{Type: "CERTIFICATE REQUEST", Bytes: csrBytes}), nil
}
Without this, the order was based on the Subject
type field order, which was
considered invalid by our CA.